Navigation
SEARCH
This form does not yet contain any fields.

    Entries in Australia (55)

    Thursday
    Mar152018

    Beetroot Orange Chocolate Chip Hot Cross Buns

                           beetroot orange chocolate chip hot cross buns

    Join me on Facebook 


    Make me smile they do (say I sounding a bit too much like Yoda), I love a chenille chick almost as much as I love a warm hot cross bun on Good Friday. 

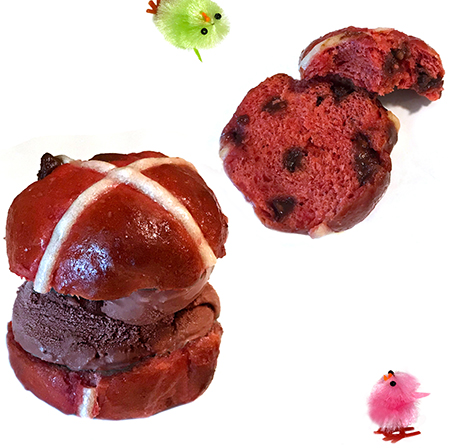
    This years hot cross bun flavour is beetroot (beet) with a touch of orange and lots of chocolate chips!! Served warm with a scoop of chocolate ice-cream and you have a delicious fun Easter dessert. 

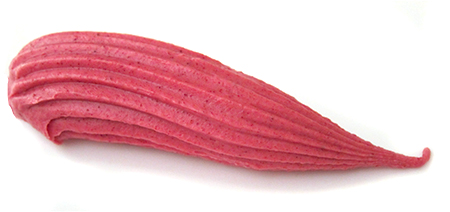
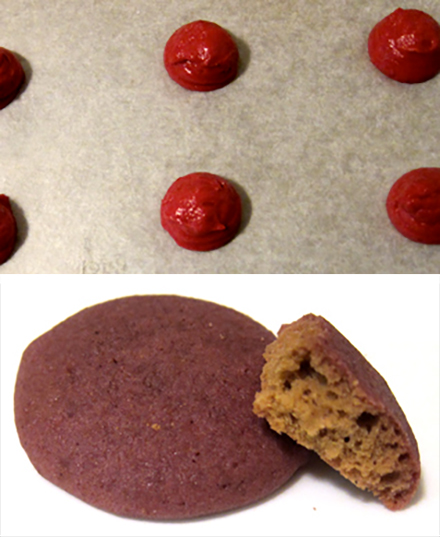
    I've been trying to preserve the colour in beetroot baking for years, here is a failed example from 2010 where brightly coloured cookie dough is piped, ending up with non descript brown. 

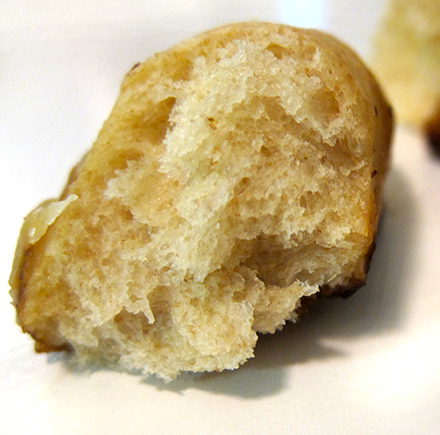
    Beetroot fresh or dried in baking is highly susceptible to rising ph levels caused by baking powder or heat, ph level over 7 and you will get a beige to brown result. I had previously got a slight colour with yeast baking but not pink/beet reddish shade I was after. 

    I remembered that the Vitamin C used in high school as a bread improver also preserved colour so I gave it a whirl and "success" I got pink buns!

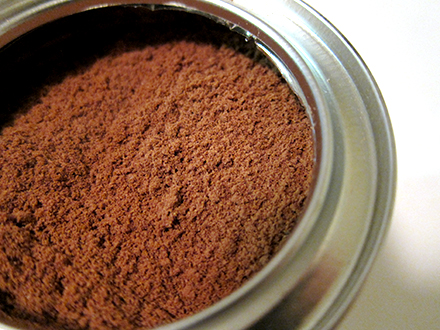
    I used *dried beetroot powder for the flavour and colour and *ascorbic acid powder for the vitamin C element. 

    The resulting beet flavour isn't "beetroot-y", but rather it tastes more like berry and pairs beautifully with chocolate. 

    Beetroot Orange Chocolate Chip Hot Cross Buns (makes 14 buns)

    Ingredients 

    for the bun dough

    350ml full fat milk

    50g  butter 

    1 lightly beaten room temperature egg

    470g white bread flour

    30g  dried beetroot powder

    75g caster sugar (superfine)

    7g sachet of instant yeast

    1/2 tsp Ascorbic Acid

    1tsp salt

    zest of one orange

    150g choc chips

    for the cross

    75g plain flour (all purpose)

    for the sugar glaze 

    1/3 cup water

    2 tablespoons of sugar

    Method

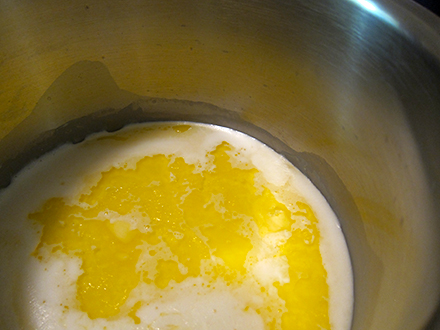
    In a small saucepan bring the milk to the boil, remove from heat and add the butter. Leave until just warm.

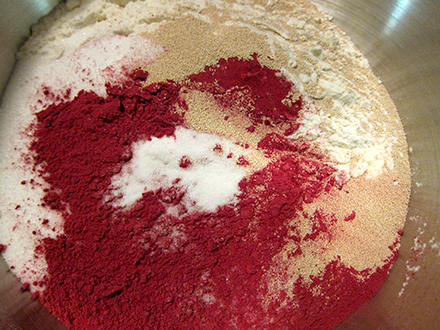
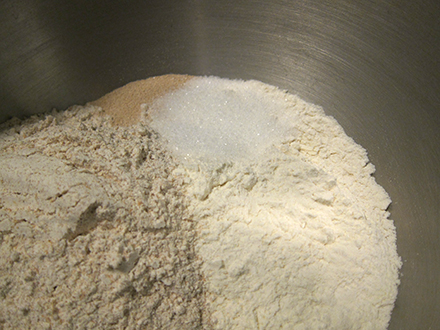
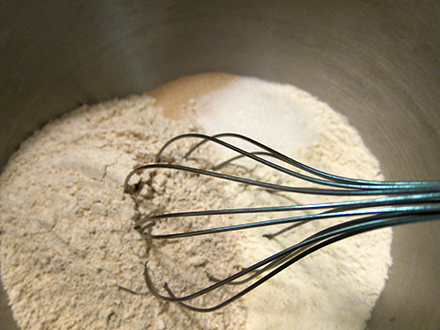
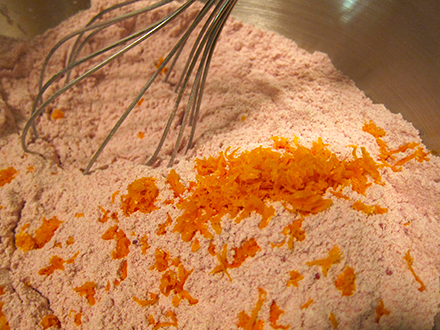
    Put the bread flour, beetroot powder, caster sugar, yeast, ascorbic acid and orange zest in a bowl. Whisk to combine, add salt and whisk again. 

    Transfer bowl to you mixer with dough hook attached. 

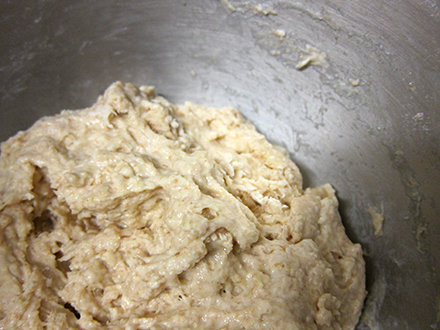
    Pour in you warm milk mixture, then add beaten egg. Mix on on low (setting 2 on KitchenAid) for 5 minutes or until dough is smooth and elastic.

    Transfer dough to an oiled bowl and cover. Pop the dough in a warm place for an hour to rise until it's doubled in size.

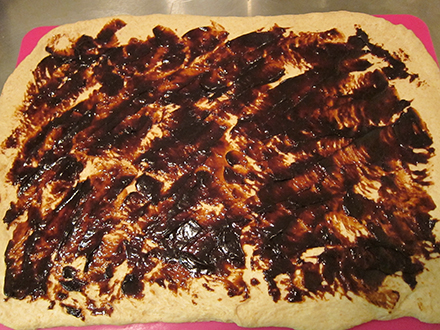
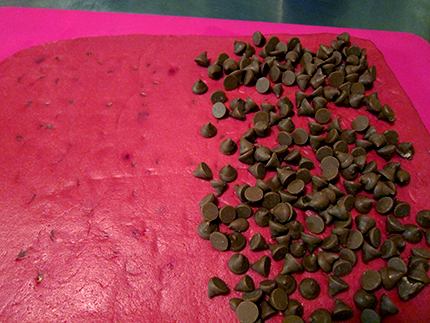
    Take your dough out of bowl and lay in on a non stick mat, roll or pat out to form a rectangle.

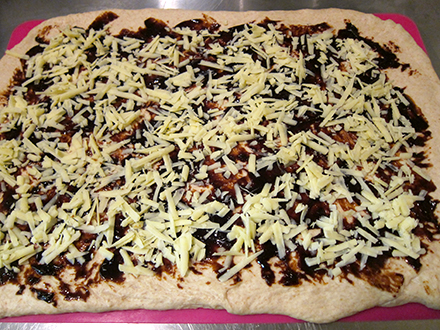
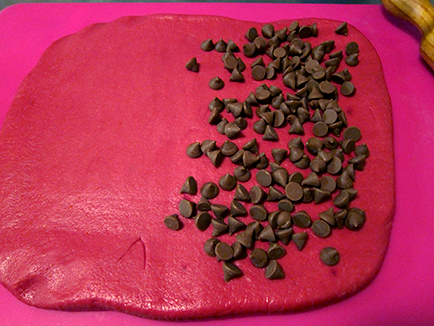
    Sprinkle half the choc chips over one half of the dough, fold the other half of dough over to cover choc chips and roll again. 

    Repeat with remaining choc chips. 

    Form the dough into a ball or roll and put it back in your oiled bowl to rise another hour in a warm place. 

    Have a baking tray ready lined with non stick paper. 

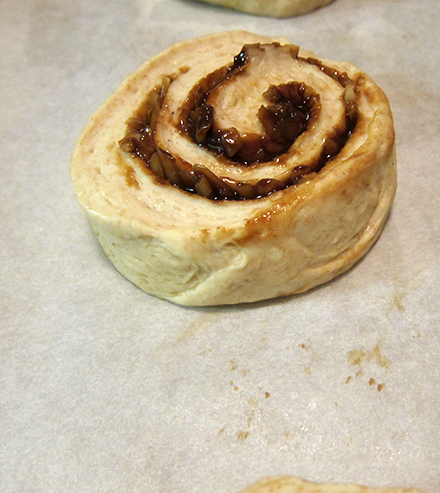
    Working with a few pieces at a time break pieces of dough the off, keeping the rest covered. I weighed my pieces to be 75 grams each. 

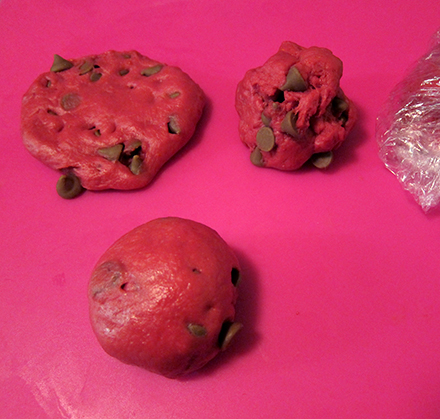
    Squash each piece into a round with the palm of your hand, fold the edges to the centre, flip over and smooth into a ball. 

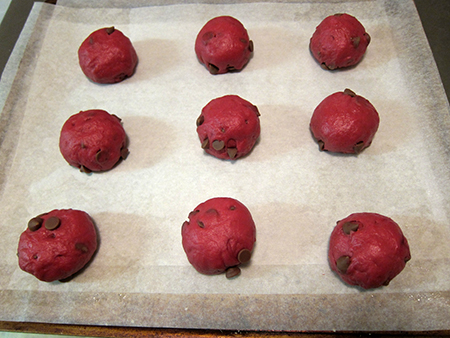
    Repeat until you have buns evenly spaced on your tray, cover tray loosely with oiled plastic wrap. Allow to rise for the final time for one hour. 

    Preheat oven to 220C (210 fan).

    Make your cross mixture by placing flour in small bowl and adding enough water to form a pipeable paste. Transfer mixture to a piping bag fitted with a round writing tip or fill ziplock bag and snip one of the bottom corners.

    Once the final rise is done, pipe a cross on each bun. 

    Bake in preheated oven for 20 mins on the middle shelf. As you won't be able to see if they are golden due to pink colouring, I have allowed for tester buns and you will still end up with a complete dozen...a bakers "snack" we could say. 

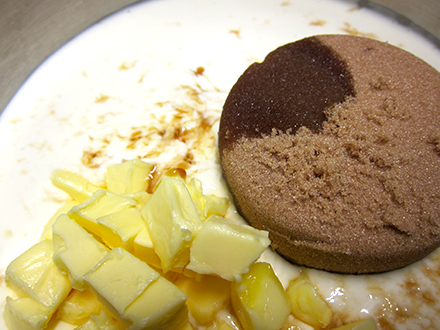
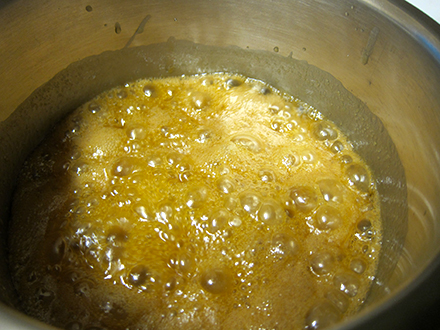
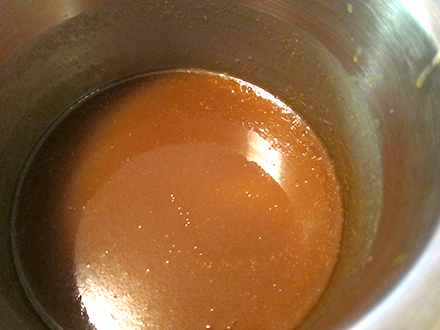
    For the glaze, stir the sugar and water together heat stirring until it starts to simmer, simmer a couple of minutes and then remove from heat. 

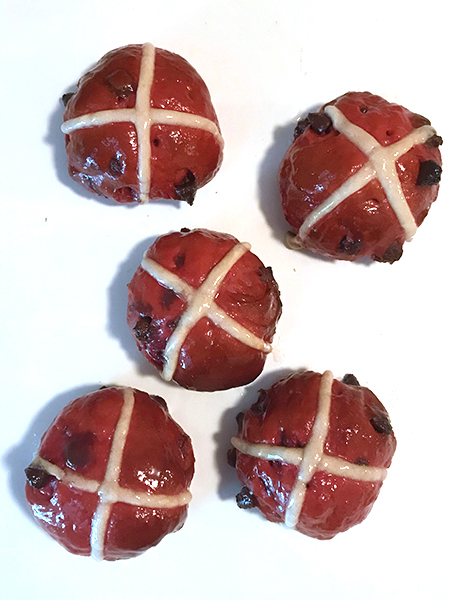
    Brush the hot glaze over the buns. 

    Buns are best served warm on the day. 

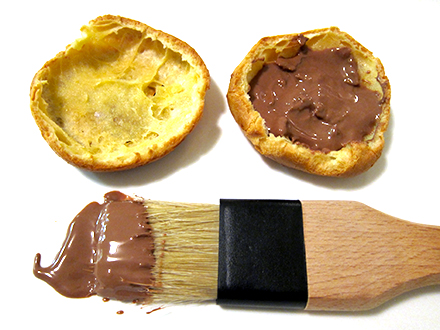
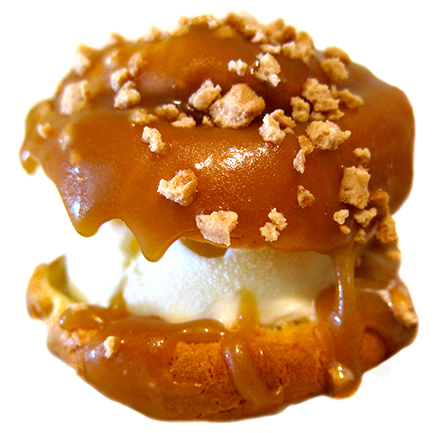
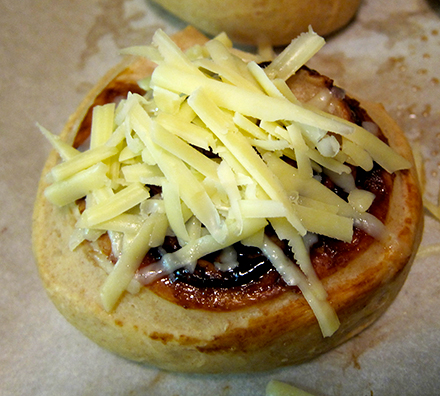
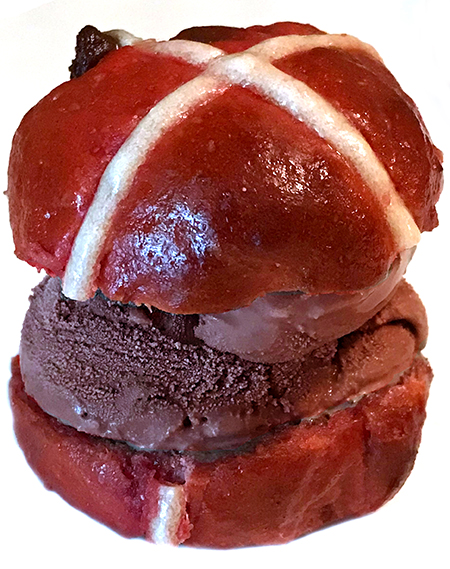
    I served mine filled with scoops of chocolate ice-cream but do try toasted with a smear of chocolate hazelnut spread too. 

    *Ascorbic Acid (Vitamin C) from chef supply stores, health food stores and pharmacies. 

    *Beetroot powder is available from chef supply stores and selected supermarkets. In Australia I use Melbourne Food Depot or Herbie's brands. 

    Other uses for beetroot powder: apart from changing up a plain hummus or tzatziki you can...

    add it straight to white chocolate... I love this for the berry/tingly flavour it brings, balancing the sweetness of the white. Stir in 1 teaspoon of sifted beetroot powder for every 100g (3.5oz) of tempered white chocolate, mould, make bark/shards as per usual. 

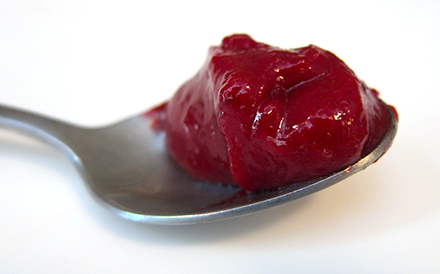
    Use as a natural colourant for you icing and frosting. 

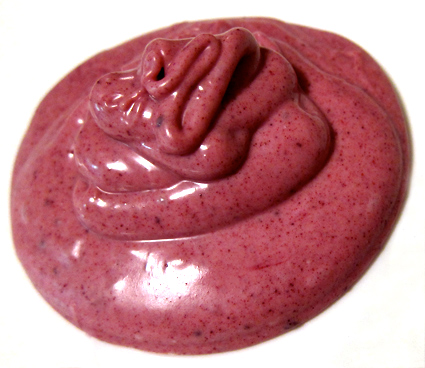
    Or love a bit of drama? Try adding beetroot powder to your mayo. 

    Happy Baking :) 

    You might also be interested in Candied Beetroot Slices 
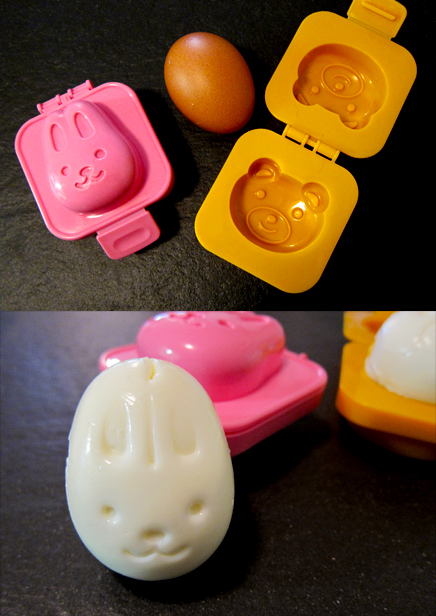
    Or prefer and bunny shaped egg

    Saturday
    Jan202018

    Milo Panna Cotta

                               milo panna cotta with milo cereal rubble

    Join me on Facebook

    Ahhhh a food "earworm" ....

    When I opened the tin of biscuit crumbs in last weeks post I thought "just like a Milo tin" and that's all it took for Milo, Milo, Milo, Milo to be stuck in my head. 

    "Solved" with a trip to the supermarket where I bought myself a tin of Milo and a brand of gelatine sheets I hadn't tried before... all came together as today's Milo panna cotta. We have loved Milo here in Oz since it was first launched in 1934 at the Sydney Royal Easter Show, brainchild of Australian Thomas Mayne. 

    Milo /ˈmaɪloʊ/ is a chocolate and malt powder that is mixed with hot or cold water or milk to produce a beverage popular mainly in Australia and New Zealand and some other parts of the world. wikipedia

    'Milo' takes it name from Milo Of Croton a 6th century BC champion wrestler. Milo products to this day have sport related themes. 

    Apart from the drinking powder, Milo comes in other products too like premix, ice-cream and the cereal I'm using today for the topping adding part of the much needed textural crunch. 

    Lets start with gelatine leaves that are the setting agent in our panna cotta.

    New to leaves? Leaves are used for a smoother mouth feel and/or a clearer finish. There is no gelatine after taste either. Great product for panna cotta. Somewhat confusing bloom strength grading system from bronze to titanium. Bloom strength is how firm your jelly (Jello) will be. 

    I usually buy gold or occasionally titanium gelatine leaves from chef supply stores. I was happy to see gelatine leaves in the supermarket but surprised when I purchased it's not marked on pack what strength the leaves are. Checking McKenzies online I found out 'McKenzie’s Gelatine powder has bloom strength of 210 – 240 g (Platinum strength). McK Gelatine leaves have a bloom strength of 220 – 250g (also Platinum strength).'

    Oh. That was my though "Oh" there may have been a slight expletive following that. Just a little suprised but I love McKenzies, it's the brand of baking powder and soda I use. 

    McKenzies have a recipe for panna cotta with 6 gelatine leaves on their site. That's too much for our panna cottas so I made two batches with far less gelatine, one with 3 leaves and one with two... now I'd prefer two or less but for no fail getting the little ones out of the ramekins lets go with three where you still get a nice wobble particularly on the moulded ones. 

    Panna cotta is easy, it's the same as making homemade jelly or Jello just with dairy for the liquid. This recipe makes four 125 ml serves (four 1/2 cups) or eight 1/4 cups. Set in glasses or in ramekins to turn out.

    Ingredients Panna Cotta

    250ml of double cream

    250ml of milk (I use 2% because that's all I had)

    I tsp of pure vanilla extract

    15 grams of sugar

    60 grams of Milo powder

    3 platinum gelatine leaves

    Fresh raspberries for top

    milo cereal, lightly crushed cocoa nibs and freeze dried raspberries to top panna cotta

    Ingredients for Chocolate Rubble 

    Chocolate flake breakfast cereal (I used Milo cereal)

    Cocoa nibs, broken roughly

    Freeze dried raspberries 

    Optional extra toppings

    Chocolate sauce

    Berry sauce

    Vanilla whipped cream with Milo powder on top

    Method 

    Soak three *gelatine leaves in a bowl with three cups of cold water for 5 to 10 minutes. After that time you should be ready to use, remove leaves from bowl and squeeze out excess water. 

    Put the cream, milk, sugar, vanilla into saucepan and heat until almost boiling but not... you know you can see teeny bubbles starting to form around edge of pan. 

    Quickly add the milo powder and whisk to completely dissolve. 

    gelatine leaves with water squeezed out

    Swap the whisk for spoon you don't want to add extra air/bubbles at this stage.

    Remove saucepan from heat and add the soaked gelatine leaves that you have squeezed the water from. 

    Stir with spoon for at least 3 minutes, even when you think it's okay after one minute the *three minutes stirring ensures the gelatine is fully incorporated. 

    Divide the mixture between the glasses or ramekins you are using. 

    Leave to cool, then refridgerate (covered) for six to 24 hours. 

    unmoulded from 1/4 cup ramekin Milo panna cotta

    inside texture 

    You want to serve your panna cotta chilled but not "fridge cold", leave glasses at room temperature for 10 minutes before topping and serving. To unmould panna cotta, dip the base/sides of each ramekin quickly into hot water and gently turn out. 

    Top with chocolate rubble and fresh raspberries, don't worry if you don't have all matching glasses the same amount of rubble/raspberries will tie the dessert theme together. 

    Use to optional sauces or whipped cream as desired. 

    Notes: 

    * don't have Milo available in your supermarket, look out for it in your asian grocery store.

    * if on the off chance after adding your gelatine and stirring 3 minutes you have a little gelatine undissolved in your mix you can put your saucepan on a gentle heat, stirring until it's melted. 

    * you can omit the sugar completely if you don't have a sweet tooth, there is sugar already in the Milo. 

    Happy Baking :) 

    Thursday
    Jan112018

    Golden Gaytime "The Crumbs"

                                        golden gaytime "the crumbs'

    Join me on Facebook

    'It's hard to have a Gaytime on your own' 

    Streets ice-cream advertising slogan

    First released in 1959 a Golden Gaytime is an ice-cream centre, choc dipped and biscuit crumbed on a stick.

    The flavour most identifiable with a Golden Gaytime is toffee and vanilla, although it was originally Strawberry Shortcake, Cassata Roma (I would have like to try that one!), Raspberry Rough and Turkish Delight before the 1970's saw the Golden Gaytime actually become a bit more golden with it's now iconic toffee/vanilla combo. 

    Now days it's available in what most of think as original toffee/vanilla, on sticks, in tubs and as an ice-cream sandwich. Plus new flavours like Pina Colada, Choc Mint, Cappucino and Unicorn. 

    And now for the "crumbs" the smart marketing department at Streets released limited edition tins of the crumbs that coat the ice-cream. Yep, a tin of crumbs. 

    Open the tin and as expected "crumbs". Guess what I put in the Christmas stocking this year along with the *limited release vegemite! 

    For Aussies this is the taste of Golden Gaytime, especially when you pair it with vanilla, toffee and a bit of milk chocolate. 

    Think choc dipping cubes of toffee swirled vanilla cheesecake and topping with the crumbs, invent a cocktail and toffee dip the rim of a cocktail glass and dip into the crumbs, swirl toffee into vanilla yogurt and sprinkle on the crumbs... few choc flakes too if you are starting the New Year living dangerously. 

    Any patisserie application where you would use Paillete Feuilletine flakes for crunch. 

    My first try using them was coating the inside of a choux buns with milk chocolate, a scoop of store bought vanilla ice-cream and a good drizzle of toffee with the crumbs on top. 

    I scrapped my usual toffee sauce, I love it but it belongs in a sticky date pud not summery ice-cream. Ended up going with a butterscotch sauce from Taste where I used golden syrup replace some of the sugar. It's a quickie to avoid hot days in kitchen over summer.

    Butterscotch... moving towards toffee sauce. 

    Ingredients

    2/3 cups of pouring cream

    1/2 cup of packed brown sugar

    1/4 cup of golden syrup (it can be maple or honey... each adds a hint of that flavour)

    2 1/2 tablespoons of cubed butter

    2 teaspoons of vanilla 

    Method

    Place all the ingredients in a saucepan. Stir over medium heat for 3 - 5 minutes until well combined.

    Watch for toffee rising up in pot, don't be tempted to multi task you don't want the toffee covered stove. Keep stirring to prevent catching. 

    Increase heat and bring to boil, once boiling reduce heat to low and cook uncovered, stirring often until sauce thickens slightly. Takes about 5 minutes. 

    Once cooked the bubbles subside and you have your sauce.

    Set aside to cool for a couple of hours. Serve at room temperature... swirling it over your creation... top with crumbs. 


    This sauce keeps in an airtight jar in the fridge for a week or so. It does set firmer in fridge so bring to room temperature before serving.

    *the tins of crumbs were a limited Christmas release... if you missed out try the end of this year or give Streets a call and see if a bakery near you can supply you with any from a bulk lot. 

    Happy Baking :) 

    Friday
    Dec292017

    Posh Vegemite and Cheese Scrolls

                     posh vegemite and cheese scrolls

    Join me on Facebook 

    "Buying bread from a man in Brussels
    He was six foot four and full of muscle
    I said, "Do you speak my language?"
    He just smiled and gave me a Vegemite sandwich"

     Land Down Under Colin Hay and Ron Strykert


    We love vegemite in Australia, in all it's black, tarry and salty glory... so when a special edition 'Blend 17' was released this Christmas I not only bought a jar of it for myself, it became the stocking filler of the year. 


    From Port Melbourne in my home state 'Blend 17' and the beloved yellow and red standard spread.

    Vegemite even has it's own street 

    I'm baking todays scrolls as snacks for the summer cricket season here, no not Jiminy but rather the game with bat, ball and stumps. 


    It's these guys... plus others that look the same as these guys. 

    The Guardian:  Steve Smith goes through for a run during a Tom Curran over on day four at the MCG. Photograph: Jason O'Brien/PA 

    It's the fourth day of the fourth test today, it's pouring with rain and they have probably stopped play, maybe they have gone to bed. That's it for all my cricket knowledge except for the "being Australian" comes with compulsory (forced, against your will or at least mine) playing of said game at family get togethers. 

    Time for the little bit posh (or at least the vegemite is) scrolls that pair perfectly with beer to eat during the cricket or anytime you are craving a salty hit.

    I've used a little wholemeal *spelt for extra flavour and differentiate from the bakery bought varieties here. 

    Posh Vegemite and Cheese Scrolls (more commonly known as cheesymite scrolls)

    Ingredients 

     2 tsp instant yeast (7g sachet)

    280ml of luke warm water (that's barely warm guys)

    1 medium egg (room temperature and lightly beaten to break up yolk/white)

    350g white bread flour

    100g wholemeal spelt four

    25g of caster sugar (superfine)

    1/2 tsp salt

    50g unsalted butter melted and cooled

    Oil for covering rising dough

    1 cup of *grated mature cheddar

    optional extra 2/3 cup of grated cheese for the tops

    1 and 1/2 to 2 tablespoons of *vegemite Blend 17 (some recipes on net use FIVE tablespoons of vegemite... much stronger Australians than I am!!) 

    Method

    preheat oven to 220cel or 200cel fan-forced

    Line two baking trays with non stick baking paper if making separate buns or line one tray if making pull apart buns. 

    Place the white bread flour, spelt flour, instant yeast and sugar in a bowl. 

    Whisk lightly to combine and then add salt, whisk again and then attach bowl to stand mixer...I'm using an electric mixer with dough hook attached to do the work, you can make by hand if preferred. With the mixer on low add the warm water slowly, then the beaten egg, then add the melted butter. You are just mixing to the rough dough stage, it will look like this.

    Cover the bowl loosely and leave for 10 minutes, after ten minutes turn the mixer back on low (never over 2 on KitcheAid) and continue to knead for 7 minutes on 2 or until you have smooth ball of dough. Remove bowl from mixer and lightly oil the ball of dough keeping it in the bowl. Cover and leave until risen by half. 

    With oiled hands punch the dough down and bring together in the bowl before turning out on lightly floured surface.

    Roll out to approx 42cm x 30 cm, spread on Vegemite leaving a the border free. The first thing I noticed about the Blend 17 Vegemite was that it is more spreadable, perfect for spreading on raw bread dough with hardly any pull.  I used 2 tablespoons of vegemite. Yep, it's not the most attractive stuff.

    Sprinkle on one cup of cheese.

    Roll up dough tightly to produce a large scroll, cut slices ... I cut mine fairly thin around 2cm but you can go up to three for larger scrolls.

    Most people will put them close together on tray and they will join together for a pull apart tray of scrolls... you can do that if you prefer, I wanted smaller separated scrolls so put them on two trays well spaced apart. For final rise lightly cover and put aside somewhere warm to they are doubled in size. 

    here a third through the final rise

    Ok here comes the optional cheese choice ... you can take the scrolls out of the oven and 3-4 minutes before they have finished baking and add grated cheese. Cons: it covers the scroll pattern Pros: you can acutally taste the cheese, otherwise the vegemite has overwhelmed the flavour. 

    Bake for around 15 minutes for two or one tray... check then if golden brown and cooked... if using two trays you may have to swap trays around for the last few minutes. 

    Eat warm the same day. 

    The 2 tsp's of yeast ensures a no fail light interior texture. 


    Vegemite ownership was returned to Australia this year after Bega purchased the Vegemite brand from international giant Mondelez. Grated cheese in scrolls is a *strong vintage Bega cheddar. 

    I couldn't fit all the vegemite recipes today so there will be sweet and a Japanese inspired savoury in months to come... but first another Australian odd thing coming up soon that is sweet with a sauce everyone can use. 

    Happy Baking :)

    *marmite, standard vegemite or other similar yeast extract can be used. 

    *substitute 50% reduced fat vintage cheddar if preferred. 

    *you can substitute plain wholemeal (whole wheat) flour for wholemeal spelt. 

    Sunday
    Dec182016

    Perfect Christmas Stollen - ABC

    Carrots for the reindeer, a shot of rum and "Perfect Christmas" Stollen for Santa. 

    Join me Facebook

    Baking along with a talented group of bakers that are a part of ABC (Avid Baker's Challenge), this month 'Perfect Christmas' Stollen. 

    This is gorgeous, the stollen that is... moist, light and aromatic, a far cry from the one you pop in your trolley at the supermarket each year.

    Starting with making the "sweetener" a mixture of sugar, lemon and orange zest that along with homemade marzipan can be made many weeks ahead if desired. 

    The marizpan is simply ground white almonds, sugar and lemon zest mixed with water.

    Dried fruit is soaked, then drained. I used hot water with a splash of rum to soak mine.

    The dough starts by making almost a sponge, an enriched starter of half the flour, yeast, egg yolk and warm milk. *Link to full recipe and the end of post.

    After 30 minutes, the other half of the flour, salt, prepared sweetener and softened butter are added. The KitchenAid does it's thing now and kneads the dough for 5-7 minutes (or 10 to 15 by hand) until you have a soft and supple dough. 

    The lovely Hanaâ from Hanaâ's Kitchen recommended the following you tube video on how to easily incorporate the fruit into your dough. The video is in Dutch, fast forward to the 1.15 point to watch the fruit being rolled in... and it works!!

    Starting to fold and roll the fruit into the dough. 

    Sprinkling the last of the fruit to be rolled into the dough. 

    The the dough is rolled into a ball and allowed to rest, covered and in a warm spot for 20 minutes. 

    After that the ball is shaped into a loaf and you guessed it, loosely covered, put in a warm spot and rests for 20 minutes.

    Now you add some egg (and butter if you wish) to your marzipan, your marzipan is then rolled into a sausage shape.

    Your loaf shape is now rolled and the sausage of marzipan lain down the center, fold, press to seal and bake.

    Once out of the oven you can brush the baked stollen with melted butter and sift over some icing sugar. I used snow sugar which is great for when you are shipping sugared baked goods or just need the presentation sugar to last without having to go into sweet over kill sugaring the top again.

    The Avid Bakers Group (ABC) is using the recipes from Weekend Bakery... here is the *link to the full stollen recipe.

    Happy Baking :)

    Want to know more about snow sugar and white sugars? I write about them here.

    Or feeling more like gingerbread custard ice-cream?

    Friday
    Dec092016

    Rich and Creamy Ginger Scones: Rose's Bread Bible Bakers

    Rich and Creamy Ginger Scones 'The Bread Bible'

    Join me on Facebook

    Scones. Ginger Scones. Rich and Creamy Ginger Scones!! 

    These little suckers live up to their name, they are "rich and creamy" and certainly ginger-y with ginger coming from two forms "ground and candied".

    Australia has a history of ginger farming/production, dating back to pre world war one.

    early photo of ginger cutters working for Buderim -Queensland Australia

    I love Australian Buderim candied ginger in all it's forms.

    I used the middle one today, glace ginger for the 'Rich and Creamy Ginger Scones'.

    You needed super cold cubed butter and chilled cream whipped to soft peaks to start today's scones.

    cubed butter ready to go into the freezer to chill

    Flour, baking powder, salt, ground ginger, turbinado sugar, lemon zest are whizzed together in a food processor before the cold butter is added for another whizz until the mixture resembles fine meal. 

    The flour mixture is tipped in a bowl, where you add the chopped ginger pieces, make a well and add the whipped cream.  The resulting dough is briefly kneaded and chilled before cutting.

    Ahhh I here comes the Australian bit, I just don't understand the trianglular shape of American scones so I'm going "British" and I cut small round ones instead of triangles. 

    I froze my rounds at this point because I had to have perfect "round" shapes ha ha. The little pieces of chilled butter in the dough will result in the light, short and melt in the mouth quality of the finished scones. 

    I didn't put extra sugar on top of the scones before baking as I was going to be serving with peach fruit preserve. 

    Scones are baked in a hot oven until evenly browned but still soft and moist inside. They are the first scones I've eaten that literally melt in your mouth they are so tender. I love the flavour of these, even though they a bit on the "too rich" side for me I can imagine them being popular for a brunch or afternoon tea served with plenty of black tea and lemon. 

    Today has been one of the 'Rose's Bread Bible Bakers' bakes where a group of fabulous bakers get together and bake from the pages of 'The Bread Bible'.

    The Bread Bibleby Rose Levy Beranbaum is available from Amazon and all discerning book stores. 

    Happy Baking :)

    You might also be interested in Aunty Clare's chocolate frog grog.  

    Saturday
    Mar052016

    No Bake Speculoos Tarts 

                                                 no bake speculoos (biscoff) tarts

     Join me on Facebook

    What are Speculoos? A lightly spiced caramelised biscuit (cookie). You can buy them in biscuit form or as a jarred cookie paste (butter). I'm using the popular Lotus brand speculoos/biscoff paste and biscuits from Belgium in these no bake "pantry ingredients" tarts. 


    'Speculoos' in Flemish and 'Biscoff' in English

    The world is in love with cookie butters. Available in smooth or crunchy, spread on bread straight from the jar it looks like peanut butter but tastes... umm, well like "squooshed up cookies". 

    Lets get started, today I've used four 11 cm x 6 cm (4.5 inches x 2.5 inches) individual tart tins. You could also use 8 smaller tart tins. The recipe is easily doubled so if your loving your cookie butter go for it!! 

    Little tart tins; a gift from Ireland .. thank you Emer, I love them!!  


    Ingredients

    1 packet (124 grams) Biscoff/Speculoos biscuits 

    62 grams (2.18 oz) unsalted butter melted

    80 grams (2.82 oz) chopped dark chocolate

    8 tsps of homemade or store bought dulce de leche or thick caramel sauce

    500 ml (16.90 oz) whipping cream

    400 g jar of Speculoo/Biscoff cookie paste

    Biscoff biscuits (cookies) in Australia come in 124 gram packets. 

    A basic crumb crust for cheesecakes and desserts is half the ratio of melted butter to biscuit crumbs.

    So for 124 grams of biscuit crumbs I used 62 grams of butter.


    Method 

    Crush the biscuits, by either pulsing in a food processor or popping in a zip lock bag and bashing with a rolling pin. Place the crushed biscuits in a medium mixing bowl. 

    Melt the butter. Make a well in the biscuit crumbs and *quickly mix together with a wooden spoon.

    Divide mixture between the tart tins you have chosen and press firmly with your finger tips or small spoon. covering the bases and sides. Chill for 20 minutes.

    Melt your chopped chocolate. Using a pastry brush or a small spoon coat the inside of the shells with melted chocolate. Chill until chocolate sets. 

    Spread two teaspoons of caramel per tart tin (one teaspoon each if using eight smaller tins). Refrigerate whilst you prepare filling.

    To make the filling put the whipping cream and speculoos/biscoff paste into a bowl.

    Whip (briefly) to combine. You are just "combining" it is literally seconds not minutes, your mixture will thicken almost immediately. Do not over beat you don't want your mixture to split. 

    Pipe or plonk. Probably best suited to plonking more than piping, but you can pipe if desired. If you are plonking, spread a generous amount of filling in each tart shell and either swirl or lift up soft peaks with a small flat knife. If piping, you get a soft "almost hold" finish.  Pop them in the fridge for a final chill.

    Either way you will have some leftover filling, this can be enjoyed from small dessert glasses with whipped cream, a drizzle of caramel, chocolate decorations.... oh and cookies for dipping if you bought extra.  

    Unmould your chilled tarts ready for serving.  Top with a dark chocolate decorations if desired. 

    *Notes: all biscuit (cookie) crumb bases are much easier to press into tins if used quickly whilst the mixture is still warm from the butter. If your room is cold or you were called away briefly you can find it more difficult to get a neat finish. A quick microwave on low for a few seconds will make the mixture easier to work with again. 

    In Australia Biscoff biscuits are available from Coles supermarkets for under $2 a pack. Speculoos (Biscoff) butter is available from Dutch Grocery stores in Australia including "It's all Dutch to me"   "Dutchfood" online and Continental Delicatessens.

    Want to swirl up your own Biscoff Spread? Jamieanne at the Sweetest Kitchen does exactly that swirls up her own out of the biscuits, coconut milk and more. Find her here.   Go a step further and bake your own Speculaas, Martha Stewarts recipe here

    Happy Baking or No Baking :) 

    Tuesday
    Jun302015

    Sugar, Sugar … White Sugar Chart

                                   Love bite 'The Simpsons' cupcake

    Join me on Facebook

    Years have gone by since I last saw an episode of 'The Simpsons', yet I nevertheless felt a sense of melancholia at the news Season 27 will see Marge and Homer legally separate... but hopefully it won't be for long. 

    Homer made me think of donuts, donuts made me think of icing and icing made me think of white sugar... so here we are a white sugar chart.

    1. White sugar (granulated) 2. Caster/Castor (superfine) 3. Pure icing sugar (pure confectioners sugar) 4. Icing sugar mixture (confectioners sugar with corn starch) 5. Pearl sugar (sugar nibs, hail sugar) 6. Snow sugar (snow powder) 7. &  8. Sanding sugar 

    1. White sugar (granulated), the most commonly used and versatile sugar of the bunch and in a pinch you can process granulated sugar into caster or icing sugar. White granulated is the sugar that you will use in much of your cake baking. With an approximate granule size of 0.5mm (0.19 inch) white sugar is the perfect size to aerate you cake batters. Use it to make toffee/pulled sugar work, caramel, cookies, confectionary and to sweeten your latte when you have decorating fatigue! 

    white sugar is used to make dropped sugar work (how to make toffee toppers here

    2. Caster sugar (superfine), is a used extensively in UK, Australian, New Zealand baking. With an approximate granule size of 0.35 (0.13 inch) it's what you use when you need your sugar to dissolve quickly, don't want to develop a sugar crust or need to dissolve in a cold liquid such as cocktails or punch. Using caster sugar in pavlovas will prevent the weeping that can occur with undissolved sugar crystals. 

    caster sugar is used in the blackberry bash meringue (recipe here)

    3. Pure icing sugar (pure confectioners sugar). I use this the most in cake decorating, it's what I use to make my icings, for dusting, piping and for rolling fondant out on. Pure icing sugar is granulated white sugar ground to a powder, it has no additives so is perfect for royal icing work, and sets to a firm finish when making a heated glace icing. It is however "lumpy" without the additives to separate the tiny granules and will always need to be sifted.

    glace icing like I used today in the Love bite cupcake and this raspberry cupcake (recipe here)

    4. Icing sugar mixture (confectioners sugar). Hate sifting or have young cake decorating kids? This is the icing mixture for you with no lumps, fuss or need for sifting. Soft icing sugar mixture is comprised of 96% cane sugar and 4% tapioca or maize starch in Australia. You cannot use icing sugar mixture for royal icing work as the starches can develop mould. The starches also inhibit "setting" that you get with heated pure icing sugar. 

    pure icing sugar and soft icing mixture

    5. Pearl sugar (nibs, hail sugar), is a popular European sugar. Pearl sugar is resistant to melting so you will see it used topping brioches, choquettes and yeasted buns. My step son Daniel and I love this sugar for it's crunch and the touch of sweetness that it adds without being overly sweet. 

    6. Snow sugar (snow powder, everlasting sugar). Another popular European sugar, snow sugar is the sugar you use at Christmas for your stollens, snowy Christmas cookies and the like. Shipping your aunt a batch of cookies? snow sugar will ensure they will be as white and snowy as when you packed them. Perfect for stencilling too as your pattern won't disappear. Ingredients in snow sugar differ a little brand to brand, the one I use has a little cornstarch, dextrose and vegetable fat added to pure icing sugar.  It has a less sweet mouth feel than icing sugar alone. 


    pearl sugar used in recent brioche post 

    snow sugar is perfect for Christmas stollens and stencilled sugar designs

    7. and 8. Sanding sugar, coarse white sugar available in different grades. With a sparkly finish, sanding sugar is used for decorating cakes, cookies and sprinkled on raw shortbreads/butter cookies before baking. Sanding sugar comes in a wide range of colours to suit any occassion including Halloween!! 

    black sanding sugar glistens on Halloween cupcake

    Happy Baking :)  

    Monday
    Jun292015

    Praline Pecan Meringue Ice Cream Sandwiches Rose's Alpha Bakers

    Praline Pecan Meringue Ice Cream Sandwich 'The Baking Bible'

    Join me on Facebook

    A quick, easy and gluten free go to ice cream sandwich biscuit (cookie) today. 

    I've made brown sugar meringues and meringue ice cream sandwiches before, but it's the combo of brown muscovado sugar and toasted pecans in these cookies that instantly turns a scoop of ice cream into a portable ice cream sundae.

    The recipe called for light muscovado sugar or dark brown sugar, my local Woolies had light and dark muscovado on special this week... and I thought I got one of each, but nah I grabbed two dark muscovado's by mistake so dark it is.  

    If you haven't used muscovado before, it has a wonderful aroma and unique treacle-y flavour that is unmatched in the world of sugars. 

    Start by toasting your pecans, then leave half whole and chop the rest into small pieces.

    Muscovado sugar and egg whites are whipped until thick and light, the cooled pecans are folded in. I divided the mixture as this stage and added choc chips to one half... just because, well "chocolate" hello!  

    Scoops are put on your lined baking tray and gently shaped to discs with a spatula. 

    Baked, cooled and filled with your favourite ice cream flavour, home made or store bought. Rose includes a recipe for 'Rose Blend Ganache Piping Glaze' for topping the ice cream sandwiches, a lovely white/dark ganache mixture that I didn't pipe I more did the "strewn" thing... delicious either way.  

    Think of pairing the biscuits with salted caramel ice cream, bourbon banana for a banana foster ice cream sandwich, chocolate (of course), burnt caramel fig ice cream, coffee (not the sweet Vietnamese coffee type, but rather an Italian espresso type to counter cookie sweetness) or just a scoop of classic vanilla. 

    The meringue mix can also be baked as cookies, just bake in scooped shape for chubby, light and crisp with squidgy centres.  

    Would I bake again? A definite yes!! Loved these cookies, with only three ingredients (or four if you add chocolate) we all need a quick pantry staple cookie. Fabulous they are gluten free.

    Would I change anything? Umm, if I added chocolate I would use a darker higher cocoa ratio variety to play against the sweetness... otherwise no.  

    How it works... now I've joined the fabulous existing alpha bakers, once a week I will post about what I have baked from Rose Levy Beranbaum's 'The Baking Bible'. This won't include the recipe due to copyright and publisher restrictions however, I will be posting how it went and photos of making/baking the gorgeous baked goods.

    Happy Baking :)

    The Baking Bible by Rose Levy Beranbaum is available from Amazon and where all good books are sold. 

    And for something totally different...  Squid ink grisini recipe.  

    Sunday
    Feb012015

    Brûlée crusted Fig cupcake 

    Brûlée crusted Fig cupcake 

    Join me on Facebook

    Fresh fruit brulee crust ... yummm!

    Not too exciting if you are located in the UK but for Australian's "Yay" a range of Billingtons Sugar is available from Woolworths (at least in Victoria). The range includes the much coveted muscovado and golden caster sugar. 

    Now you can bake cake, desserts and the like from your Nigella, Jamie, Mary Berry and Paul Hollywood books without substituting ingredients. Plus the golden caster sugar makes for a fabulous brûlée crust when sprinkled on cut fresh fruit and given a quick torch. 

    Sprinkling cut fruit with *golden caster sugar and "torching" makes for a quick dessert cupcake topper.

    Whether from a kitchenware store or the hardware shop, mini blow torches make quick work of melting sugar into a caramel crust.

    Very ripe fruits only hold the brûlée for a few minutes before they start to dissolve into a lovely caramelly drizzle... perfect topper for dessert cupcakes, cheesecake or even a pavlova. My stepson (when he was old enough to wield a torch) loved making brûlée crusted banana slices to serve with vanilla ice-cream. Brûlée fruit is wickedly good on cornflakes, your porridge or morning yoghurt. 

    Today I used fresh figs, but halves of small ripe plums, or apricots, wedges of fresh peach, banana slices, orange segments and the like make a fab quick dessert. Cupcake bases that work well include almond sponge, vanilla sponge or butter cake, spiced and nut flour cakes. Ummm, something creamy for the topping is good, whipped cream, cream fraiche, a yoghurt whipped cream combo or perhaps your favourite butter cream. 

    Have your cupcakes ready and just before serving lay you pieces of fruit cut side up on a baking sheet. Sprinkle with golden caster sugar, liberally (but don't go crazy!!). Light your torch, pass the flame over the sugared fruit pieces (almost like spray painting, even sweeps) holding the tip of your torch 7-8 cm (around 3 inches) away from the sugar. You sugar will start to bubble and caramelise. All done,  just wait a few minutes before handling, sugar drips burn! Enjoy. 

    Happy Baking :)

    * can't get golden caster sugar? raw or white caster sugar work well or just plain white sugar in a pinch.  

    Ready to stretch your sugar skills? How about a toffee dipped hazelnuts or banana chips how to...

    Want to know more about brown sugar? Updated chart here